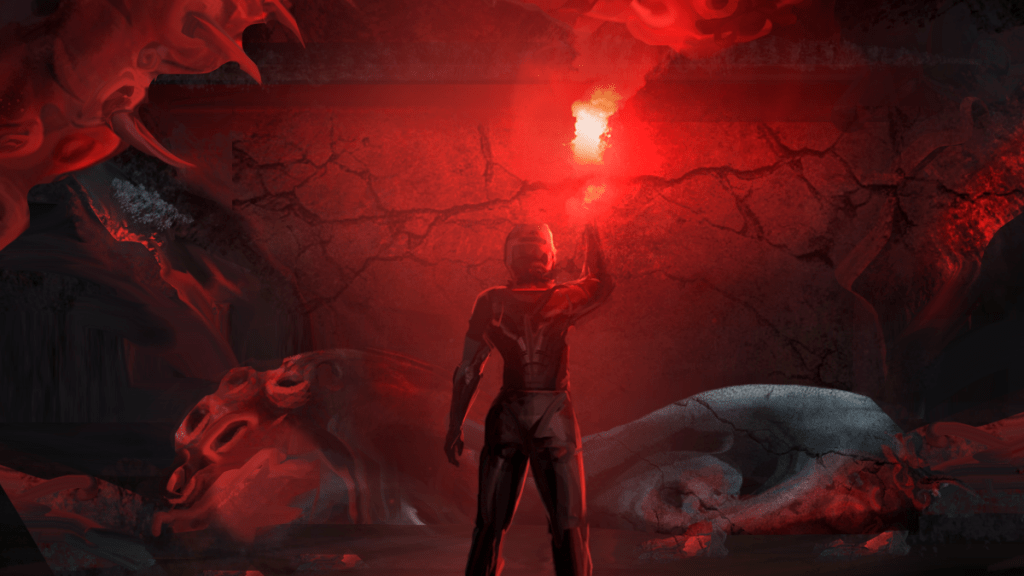
Not Dead Yet

You may once again be forgiven for thinking that I might have finally succumbed to the enticing pull of the hereafter. But I haven’t. I just haven’t written anything. Which is different.

After writing about too much Star Wars, I ran out of things to write about. Infinity War? Iron Man and Captain America will die. And Loki. Cyberpunk 2077? We’ll see it at E3. And…done.

If you’re in need of any more Hero’s guides, let me know. God forbid you find yourself out in the deep blue sea, surrounded by super-intelligent sharks that can swim backwards and you haven’t read a guide on how to handle the situation.

In terms of proper writing, I have just crossed the 85,000-word mark of my fifth novel today. Which will, when released be my sixth. And it will be book five of the NEXUS series. Yes.

If you read my books and can count, you may wonder what happened to book four (which should be my fifth novel but will actually be my sixth, except in terms of release, in which case it will indeed be my fifth. Just to clarify). I haven’t written it. My books do have slightly different tones, and some are too different to write from the same mindset. These two, to, have two too different tones. It’s true. So I’ve been unable to get myself in the right mood to write book four, but book five has been going fine. It is, if you are curious, taking a pinch of the noir from my thriller, Acts of Violence, and adding it into the mix. Not so much as to bring it out of the NEXUS series, but enough that I can’t write it and a lighter, more space opera-ish one at the same time (which is entirely in the style of Blades).

Aside from this I have been doing entirely pointless things like painting garden statues. I walked into Homebase just after Christmas and came face to face with a load of Star Wars characters. Naturally, I thought: I should paint those. So I did. Well, I (badly) painted Yoda and R2 and then lost the urge.

Yoda & R2D2 unpainted Yoda & R2 Painted

Then I decided to sculpt stuff out of polymer clay, which is the natural progression of painting polystone garden statues. I made Superman. Kind of. I am now working on a full figure of the main character of my current book. So if it looks wrong…well, it’s you who’s wrong. It’s going okay, except that I have no idea what I’m doing.

 Superman head sculpt   Figure sculpt

I also have a three-legged cat now. His name is Hop.

No doubt Thanos will demand that I return to say I told you so when dust is bitten, but hopefully I’ll think of something to say before then. So…bye. Bye then.

Bye.

Blades of the Fallen – Out Now

One last update: Blades of the Fallen is now available for Kindle, in all other e-formats, and in paperback.

Blades of the Fallen is a standalone novel in the NEXUS space opera series.

Blades of the Fallen Cover

The murder changes everything. The Vanguard is supposed to protect against such violence, not fall victim to it. But even the so-called ‘Fallen’ wouldn’t kill without reason. Would they?

The murderer changes everything. The Fallen keep to themselves, living comfortably separate to other Necurians. But he is dragging them towards war. Why is he so convinced that it’s the Vanguard’s fault?

The inquisitors have changed. As teenagers, they witnessed the murder in front of their eyes. Five years later, they wield the authority of the Vanguard, and they will hunt down the killer. The motives must be uncovered. Because even the Fallen would not kill without reason.

Meet a handful of the characters:

Solan | Rialen | Ailan | Mara

Newsletter and Stuff

mailchimp

Actually, no stuff. Just newsletter. You probably noticed when you came to the site that a pop-up asked you to subscribe to my new newsletter. I’m a little late to it, but I thought it was about time to start building up a list of people who might like to support me and who might be interested in new releases and, occasionally, whatnot.

The pop-up itself I can’t customise any more than giving it a 5-second delay, which is annoying because who’s going to know if they want to sign up within 5 seconds?

Anyway, the newsletter will be very infrequent: mostly when I have a new release or something changes with a current book, and in the rare event that I actually write multiple decent blog posts. I will also keep an eye out for other interesting news and stuff with which to fill them out. So, expect something like 2-3 per year…

If you closed the pop-up but this invigorating, rallying cry has changed your mind, there’s a link to the quick sign-up form at the top of the sidebar. Thanks for your support (not a guilt trip).

Battles of Hastings

This time around, the decision was made not to release Wyrd Worlds III, the science fiction and fantasy anthology I was a part of the first two times. Instead, several of the authors involved in those anthologies are releasing short stories to coincide with the 950th anniversary of the Battle of Hastings.

These stories are already up for pre-order, so you can make sure to have them in your collection on the day (14 October).

THE BATTLES OF HASTINGS, BY STEPH BENNION

The Battles of Hastings, by Steph BennionWho really won the Battle of Hastings? Eighteen-year-old Jane Kennedy, a twenty-first-century Chicago girl on her first field assignment, had expected a simple mission to gently ease her into the time-bending realities of her new job. Yet here she was, lying semi-conscious amidst the wounded and dying of a particularly gruesome battle, wondering what the hell she had let herself in for. In this novella based on Jane’s memoirs, follow her strange journey through multiple realities as her fellow time travellers each realise they come from a future with a different past. Is there a rogue on the loose out to change history? The Battles Of Hastings is a romp through alternate time lines in England 1066 to mark the 950th anniversary of the invasion that shaped Britain and Europe today.

PRE-ORDER NOW FROM SMASHWORDS


THEY MARVEL AT THE STAR – L J HICK

hastings-lj

Thomas is a member of the Fyrd and is recruited into Harold Godwinson’s army to confront Duke William II of Normandy. He is befriended by a blond-haired man called Kauko as they march to war. Thomas has no time for lords, kings or gods of any kind but Kauko seems to have a large amount of time for Thomas. Why is Kauko so interested in the welfare of a farmer’s son, and just what does he intend to do with him? As the relationship develops and the pair of them confront the stupidity and darkness of war, Thomas comes to realise that they did not meet by chance. In fact, Kauko has been preparing for this for a long time.

PRE-ORDER NOW FROM SMASHWORDS


NORMAN BLOOD – BARBARA G. TARN

hastings-barbNineteen-year-old Robert Malet followed William the Bastard to England to claim the English throne. The battle near the small town of Hastings is the beginning of the Norman conquest of England, but also of Robert’s second life.
A vampire in 12th century Europe traveling, fighting and meeting his siblings in darkness, changing names through the years when his mortal life is gone.
Follow Robert Malet, Brother Geoffrey, Robert Capuchon and Mercadier through the years. History and fantasy based on medieval chronicles for a Vampires Through the Centuries novella.

PRE-ORDER NOW FROM:

SMASHWORDS

KOBO

AMAZON


EADWEARD – A STORY OF 1066 – VICTORIA ZIGLER

hastings-victoriaIt’s October 14th 1066, and King Harold’s Saxon army is about to go in to battle against Duke William’s invading Norman army. Among the ranks of the Saxons are two boys who shouldn’t be there: Eadweard, and his best friend, Cerdic.
Daydreams of becoming great war heroes had the boys convinced to disobey their Fathers and go to war, despite the possibility of punishment if they were caught. Now it’s time for the battle to begin, and Eadweard is starting to wish he’d stayed home after all. But it’s too late to turn back now, and Eadweard finds himself witnessing the events of the battle that would later be called The Battle Of Hastings, and learning how different from his imaginings the reality of war actually is.
*Note: This is a work of fiction, which is based on actual events. It tells the story of the battle between King Harold’s Saxon army and Duke William’s Norman army, which took place a short distance away from the town of Hastings on October 14th 1066, in a place now known simply as Battle. Though this is a children’s story, the recommended reading age for this book is eight years and over, since it is a story that takes place on a battlefield, and therefore contains scenes of violence that are not suitable for younger, or more sensitive, readers.

PRE-ORDER NOW FROM:

SMASHWORDS

BARNES & NOBLE

APPLE iBOOKS


Still Alive

You might be forgiven for thinking that perhaps I had died and decided that in this new state of unliving, I would abandon my blog. This is, you will be ecstatic to hear, not the case. I have been busy with a death that doesn’t belong to me, the following despicable family behaviour, a job, a new car (it has GT on the back!), moving house, trying to get internet, and making my beta readers cry.

Yes, finally, the third book in the NEXUS series is (kind of) finished. I started writing it as soon as I finished Temple of the Sixth and set it aside time after time to write Kira, Acts of Violence, and Kira Part II, but at last the most abused book I’ve worked on is nearly ready. It still needs a bit of rewriting and then editing and proofreading, but it’s not too far off now. Hopefully.

Trip To Space

After this stop-start, stop-start, I hope at least the next two books will come quicker and smoother, but thinking about other projects is what got me into this four year crawl in the first place, so let’s ignore that for now.

So, sooner or later I’ll be posting again with a synopsis and release date…or just a cover. Or a rant about another film.

New Cover

Just a quick update to say that I have changed the cover for the ebook version of Acts of Violence to fit the new paperback version (available soon). There’s a little man and everything! Here they both are:

Acts of Violence paperback cover

Paperback Cover

Acts of Violence eBook cover

Kindle Cover

Suspending Disbelief: The Line

This is another article I wrote for Uproar Comics.

Suspend Disbelief

When it comes to films, games, and even books, we’re often expected – and required – to suspend our disbelief concerning certain things. Giant, transforming, alien robots…okay. Scientist turns into a big green monster when he gets miffed…fine. Peter Quill floats in space for a minute and survives?! Absolutely unacceptable!

That was the complaint about Guardians of the Galaxy (a year ago now) that sparked in me the question: where is the line? And why is it there? I don’t expect to be able to answer the question, or make a coherent argument with whatever it is I’m about to write, but that’s not going to stop me from diving in.

So let’s start with that complaint. Guardians of the Galaxy: a superhero film (kind of – I’d argue about that, but it’s irrelevant) about a group of criminals coming together in a distant part of the galaxy to prevent an already-powerful blue person from using an alien artefact to wipe all life from the surface of the planet Xandar. Yep, all good so far; why there’s barely any disbelief to suspend.

The aforementioned group consists of a human kidnapped by aliens as a child, an artificially enhanced green assassin, a big red angry man who takes everything literally, a bipedal talking raccoon, and a talking tree monster. All fine. Nothing untoward there.

However – and here is where the film apparently crosses that line – what GOTG seems to have drawn the most criticism for is a scene where Gamora the green assassin finds herself floating in space. Quill, the human, gets out of his ship and puts his breathing mask on her. A minute later, they’re picked up by another ship and they’re both fine.

‘How unrealistic’, people said. Unlike the talking raccoon arguing with the talking tree.

First off, let’s look at what happened in the film versus what would happen in real life.

Fiction

Guardians of the Galaxy

Gamora’s ship is destroyed, leaving her floating, unconscious, in open space just outside the atmosphere of where they’ve come from. Quill, in his leather jacket and t-shirt, gets out of his own ship and floats over to her. He takes off his mask, which allows him to breathe, and puts it on her. As he watches her, his eyes and face begin to freeze over and he loses consciousness. Shortly after, they are picked up by another ship, and as they tumble into the cargo bay – or whatever – he wakes up. Seconds later, so does Gamora.

Reality

Let’s assume that Quill was a real person, floating just outside the atmosphere of Earth, without a spacesuit. What would happen to him? That’s rhetorical; I’ll tell you:

  • Ebullism – The low pressure of a vacuum means the boiling point of Quill’s body fluids drops below his body temperature, causing the formation of gas bubbles in said fluids. His blood won’t boil, but he will swell up to twice his normal size. Which will hurt.
  • Within about 15 seconds, the lack of oxygen will cause him to lose consciousness. He’d then die a couple of minutes later. If he tried to hold his breath to extend that time, that air would expand rapidly, rupturing his lungs.
  • Although it’s a touch chilly, he wouldn’t freeze to death, because the vacuum means the transfer of heat would be so slow, the lack of oxygen would get him first.
  • The sun’s UV would burn him quite unpleasantly, then it would join other things such as gamma radiation and X-rays to damage his DNA. In turn, this would cause mutations and probably cancer.
  • He would, however, have about one or two minutes to be rescued.

Going by memory alone, I think Quill is exposed to space for between thirty seconds to a minute. After removing his mask, he did indeed lose consciousness pretty quickly. So the most unrealistic part of that scene seems to be that he didn’t swell up, he didn’t burn, and he froze over. We could argue that he only froze on the surface and that this might happen (I’m not a scienceer). How fast he would swell and burn, I don’t know; perhaps it would take longer than he was actually out there.

So that leaves the DNA mutations and cancer. But where are they?

AstronautNot here, in our solar system. Are they being exposed to the same things as they would just outside Earth’s atmosphere? In the same quantities? I don’t know. Do you? Do the complainers? Would so much time travelling in space, on different planets, etc, have changed the way his body would react to things? Someone probably knows, but it’s not me. Perhaps the NASA advisor they used for the film knows.

So these people can deal with a talking raccoon (in the same universe as a god of thunder, teleporting mutants, and gargantuan ‘celestial beings’ whose skulls are used as cities floating in space), but the fact that the rest of the film after this scene didn’t deal with the tragic loss of Peter Quill to cancer is too far over the line. Interesting.

What if it was Superman in space? Would the same people be annoyed that he survives rather than dying horrifically?

The line is different for everyone, of course. My grandmother would never watch something like Guardians of the Galaxy – or indeed Superman – because they have ‘weird aliens’. There’s plenty of things I’ve watched that made me roll my eyes, though I can’t think of any now.

Beyond the Guardians

Shadow of the Wraith, Kindle coverI’ve complai…uh…mentioned before a 3-star review I’ve had on my first book. According to the review, it lost a star due to taking ‘an unexpected turn into fantasy territory’. I won’t bother mentioning the inane nature of complaining about a science-fantasy novel having fantasy elements (oops, I just did), but this is perhaps her line. When sci-fi becomes science-fantasy, she can’t suspend her disbelief any more, perhaps. Star Wars is fine until the Force comes into play. Likewise, mine was fine until telekinesis came into play. Or, as she called it, ‘use his “special powers”’. Not that I’m bitter.

And what about within the book? If someone went into it, open to the inevitable fantastic elements of a science-fantasy novel, where might their line be then? The telekinesis, telepathy, etc, that are possessed by one of my alien races? The not strictly realistic space battles? The androids? The dragons? I suspect the last one might be a line for a lot of people. Until they open book two and discover immortal ‘gods’, angels and zombies. Technically not zombies actually. But the dragons are alien animals, not creatures of myth. Does that help? It might help person A but not person B.

What about CSI? ‘Enhance!’ ‘Enhance more!’ ‘Enhance again and zoom in on that reflection in the reflection and enhance!’ Most people can’t quite suspend their disbelief enough for that, but others can. Perhaps it depends simply on how much you know – or think you know – about the subject in question.

I hope you don’t think I’m going anywhere with this, or making any kind of point. Because…I’m not. Maybe I should. But I won’t. Don’t be annoyed – I told you at the start this wasn’t going to go anywhere! It’s simply a question that can’t be answered. Not by me, anyway.

So, what’s the line for you? What was the last thing that made you roll your eyes and groan?

Kindle Direct Publishing Formatting Guide

E-Book


I recently wrote a guide on writing a book, and in it I said that I would write a guide to formatting for KDP (Kindle Direct Publishing). This will be vaguely similar to my Smashwords formatting guide, but simpler.

I’ve heard of plenty of people using the simple, automated process that KDP seems to expect by default, but to be absolutely sure that no issues will arise by the conversion process, I convert my Word file into an HTML file first. Doing so means that, so long as I make sure only HTML tags that the Kindle recognises make it through, what comes out the other end of KDP will be exactly what I want. The only errors possible in this way are any made by me.

Most people think that because this is done through HTML, it is therefore over their heads and far too hard and technical. In reality, HTML is a lot easier to grasp than you probably think. More to the point, you don’t really need to know HTML; you simply need to know what HTML tags should and should not be present in your file.

What You Will Need:

  • Microsoft Word (it shouldn’t matter which version, and if you are using any other program, it should be the same principles – you may simply have to look harder for the menu options I mention)
  • Notepad++ (free here)
  • Dreamweaver (or another HTML editor)

Or

  • Windows Notepad (expensive web design software isn’t really necessary)

What We’ll Be Doing:

As with the start of the Smashwords formatting guide, we will start by tagging and then removing any and all formatting. Or at least, so far as Word will allow.

We will then save as a web page, telling Word to keep out the clutter. Word will ignore us and leave in lots of pointless crap we don’t want or need, so we will take the file to Dreamweaver or your equivalent and remove those unnecessary tags.

That’s it.

To see the HTML tags supported by the Kindle, click here. If that looks daunting, we’ll be using very few of them anyway. This is a list of the most commonly used tags. Much smaller.


LAYOUT

At this point, you should probably have the book laid out the way you want anyway, but if you haven’t then this is a decent order:

  • Title
  • Copyright
  • Table of Contents
  • Author’s Note
  • The main content
  • About the author
  • Anything extra

Of course, there’s a good chance you won’t want an author’s note, and a table of contents isn’t necessary.

If you’re unsure what kind of copyright page to put in, it can be very simple, or it can go a bit further, like mine:

Copyright © 2012 Ross Harrison
Cover copyright © 2012 Ross Harrison
Cover design by Cui Yuan
The right of Ross Harrison to be identified as the author of this work has been asserted in accordance with the Copyright, Designs and Patents act 1988.
All the characters in this book are fictitious, and any resemblance to actual persons, living or dead, is purely coincidental.
All rights reserved. No part of this publication may be reproduced, stored in a retrieval system, or transmitted in any form or by any means, electronic, mechanical, photocopying, recording, or otherwise, without the prior permission of the author.

NOTE: If you are doing this after formatting for the Smashwords edition, make sure that the line ‘Smashwords Edition’ isn’t still in your copyright information.


EM EN EMs

You will want to make sure your em dashes and en dashes are done right. While we’re at it, we might as well make sure your ellipses and quotation marks are right. The latter two won’t look any different on Kindle (actually, the quotation marks may look different on the more modern Kindles), but the dashes will.

If you’ve had the following options selected while writing, and Word has automatically changed your dashes and whatnot, then you can skip this bit.

  1. Click on the big yellow button in the top left of Word, then Word Options at the bottom of the drop down list (in earlier versions of Word, click Tools and then AutoCorrect Options, then ignore step 2)
  2. Click Proofing and then AutoCorrect Options
  3. In both the tabs AutoFormat and AutoFormat as You Type, make sure the options ‘Straight Quotes with Smart Quotes’ and ‘Hyphens with Dash’ are checked

AutoCorrect

Click OK until you’re back on the manuscript. Now we’ll use Find and Replace:

  1. Press Ctrl+H to bring up the Find and Replace window
  2. Find: “ and Replace: “ (Double quotes will automatically change to the nicer, curved ones)
  3. Find: ‘ and Replace: ‘
  4. Find: – and Replace ^+ (This creates an em dash)
  5. Find: – and Replace ^= (This creates an en dash)
  6. Find: … and Replace: … (In Find, type three full stops (periods). In Replace, press either Ctrl+Alt+. or Alt Gr+. for a proper ellipsis)

PRESERVE FONT FORMATTING

In order to make it a little easier when we get to the HTML editing part, we’ll remove all formatting from the document. This means that italic, bold, and underlined text will become normal text.

The problem with this method is that if you had text in italic, bold or underlined, and then deleted it, there may be white space with one of those still applied to it. This won’t matter (except in the case of underline) in the finished product, but I like to keep things as clean and tidy as possible, and so I don’t want that. Because we’re using Find and Replace, you can get around this problem by replacing one instance at a time, ensuring that you skip over anything that isn’t meant to be kept italicised, bold, or underlined. It could get tedious, but you probably shouldn’t have very much of this in the book anyway and I highly recommend doing it this way to ensure no issues.

First, press Ctrl+H to bring up the Find and Replace window. Remember not to type the quotation marks in the following:

– Italics:

  1. Click inside the Find box, then press Ctrl+I and it will say ‘Font: Italic’ beneath the box
  2. Leaving this box empty, now click in the Replace box and type ‘[i]^&[/i]’
  3. Go through one by one, or click ‘Replace All’ (see above)
  4. Click in the Find box again and press Ctrl+I until the format line beneath the box disappears

– Underline:

  1. Click inside the Find box, then press Ctrl+U and it will say ‘Underline’ beneath the box
  2. Leaving this box empty, now click in the Replace box and type ‘[u]^&[/u]’
  3. Make necessary replacements
  4. Click in the Find box again and press Ctrl+U until the format line beneath the box disappears

– Bold:

  1. Click inside the Find box, then press Ctrl+B and it will say ‘Font: Bold’ beneath the box
  2. Leaving this box empty, now click in the Replace box and type ‘[b]^&[/b]’
  3. Make necessary replacements
  4. Click in the Find box again and press Ctrl+B until the format line beneath the box disappears

If for some reason you want to enclose your formatted text between something other than ‘[i]’, etc, you can; the ‘^&’ is the important part. That said, don’t try to be clever and use the HTML tags of ‘<i></i>’, etc, because Word will assume later on that you want it to literally look like that, and replace those brackets with code to display the brackets, rather than making them said tags… Understand? In other words, the result will be ‘&lt;i&gt;Text&lt;/i&gt;’.

Preserving Italics

Do the same for anything else that will need attention, such as chapter headings (except not i, u, or b).


NUKE IT

Strictly speaking, this step isn’t entirely necessary, but it will cut down on the clutter when we get to the HTML editing.

  1. Open Notepad++ and create a new file if necessary
  2. In Word, press Ctrl+A to highlight everything, then Ctrl+C to copy it
  3. In Notepad++, press Ctrl+V to paste in your manuscript

It will look confusing and messy, but that’s fine. Don’t try to change anything. Let’s make it slightly less messy:

  1. Press Ctrl+F and click on the Replace tab. Select ‘Extended’ in the ‘Search Mode’ section at the bottom
  2. In the Find box, type ‘\t’ (without the quotes). Leave the Replace box empty, making sure there is no blank space by default, and click Replace All. This deletes tabs
  3. In the Find box, replace the ‘\t’ with ‘\n\r’. Still leaving the Replace box empty, click Replace All again. This will delete blank lines. NOTE: You may need to perform this step again after step 6
  4. In the Find box, replace the ‘\n\r’ with ‘ ‘ (two spaces), and in the Replace box, type ‘ ‘ (one space). Click Replace All. This deletes double spaces
  5. Close the Find and Replace window
  6. Click Edit -> Blank Operations -> Trim Leading and Trailing Spaces. This will delete space before and after paragraphs

You work will still look confusing, but a little less messy. If there are any blank lines, perform step 3 again.

Deleting Blank Lines

Deleting Blank Lines


FLYING VISIT TO WORD

After saving your Word document, as a new version of course, close it. Now create a new Word document.

In Notepadd++, press Ctrl+A to select everything, and Ctrl+C to copy it. Now go to your new Word document and press Ctrl+V to paste your manuscript in.

DON’T TOUCH ANYTHING!

Now click the big yellow button in the top left (or File) and then Save As. Save in whatever location you want, under the book’s title, but save as file type ‘web page, filtered’ and add an ‘L’ (but lower case) to the end of the file extension. In other words, it should read ‘Your Title.html’.

Close everything.


WEAVE YOUR DREAMS

Now open your new web page in Dreamweaver (dragging it over the Dreamweaver desktop icon is the simplest way), other editor, or simply Windows Notepad.

If you are familiar with HTML, you’ll probably be relieved at how little code there is. If you are not familiar, you may be worried at how much code there is. The good news is, most of it is the same little bit of code recurring over and over, so it’s easy to get rid of.

To begin with, you’ll find things a lot easier if you understand that almost all HTML tags have an opening and a closing tag. For example, the paragraph tag opens with <p> and closes with </p>. The closing tag always has that forward slash.

First thing to do is find the opening tag ‘<style>’. In Dreamweaver, and possibly other editors (which I will now stop referring to because it’s getting annoying), the tag is in pink font, but obviously in Notepad it won’t be. Highlight the whole style section (remember, that’s from <style> until </style>) and delete it.

HTML Start

That gets the main eyesore out of the way, and you’ll now be able to see the start of your actual content. Let’s start at the top. All that needs to be at the top is:

<html>
<head>
<title>(Your Book's Title)</title>
</head>

So delete anything else and correct the title if need be.

The next thing should be the ‘body’ tag, but it has unnecessary rubbish in it, along the lines of ‘lang=EN-US’. Delete that, and the space before it, so that the tag reads simply <body>.

After the body tag, the next thing you should see is the very first bit of text of your book, preceded by <p>. Delete anything between the body tag and this. In my case, the only remaining thing in between is

. Divs have no place in our particular HTML file.

Next comes a simple but time-consuming process. We need to delete all of the unnecessary code. In the following bits of code, yours may read slightly differently to mine, so make sure to copy and paste from your own file and not this guide. At the moment, what we’re aiming for is to leave every paragraph with only the

tags on either side.

For example, the first paragraph of my first chapter looks like this to begin with:

As his nose cracked under my knuckles, I reflected on how much I hated violence. Not violence stemming from my own unresolved anger issues. That I was fine with. It was violence against women that I hated. I didn’t know why, but the prettier the girl the more I hated it. Maybe I was shallow.

It should read simply:

As his nose cracked under my knuckles, I reflected [...] Maybe I was shallow.

You’ll see that the MsoNormal rubbish is at the start of every paragraph, so it’s easy to get rid of a lot of that clutter:

  1. Highlight ‘ class=MsoNormal‘ (including the space, but NOT the right-hand bracket) and press Ctrl+C
  2. Press Ctrl+F (or Ctrl+H in Notepad) to bring up the Find and Replace box
  3. In Dreamweaver, make sure the ‘Find In:’ box says ‘Current Document’ and the ‘Search:’ box says ‘Source Code’
  4. Click in the Find box and press Ctrl+V (it may already be there in Dreamweaver)
  5. Make sure the Replace box is empty (that includes any blank spaces) and click Replace All

This will take around 30 seconds, perhaps a minute, maybe a little longer in Notepad. Just make sure to save after everything you do, especially with Notepad, as it can be a little temperamental.

You can probably guess what is next.

  1. Highlight ‘‘, this time include both brackets. Depending on where you’re from, this might say something slightly different, such as ‘EN-US’
  2. Open Find and Replace and repeat the above steps
  3. Now do the same with

Now it looks a lot less untidy. It’s mostly your text, with the odd blue (unless you’re in Notepad) HTML tag dotted about.

Go to the very end of the file. After the final

, it should look like this:

</body>
</html>

Delete that closing ‘div’ tag.

This should conclude the tidy up, because we took it into Notepad++ to get rid of as much formatting as possible. Just in case, though, you should run a search for the following tags and delete them if you find any. Remember to also delete the closing tag. After this, scan it all to see if anything catches your eye. Remember, except for the front matter – which we’ll get to in a minute – you should only see <p> in front of your paragraphs, and </p> at the end.

  • <div
  • ‘<p ‘ (that’s a space after the ‘p’. If you find any paragraph tags with more than just the ‘p’, correct it to simply <p> – there should never be a space)
  • <span
  • &nbsp; (replace these with ‘<br />’ – I’ll mention this again later)

THE REPLACEABLES

Don’t steal that title, it’s for my Expendables rip off with washed up TV stars. And I’ll sue you.

You’ll be wanting your italics, bolds, and underlines back now, I suppose. If you went through these in the Word document one by one, as I suggested, then you’ll be okay to use ‘Replace All’ this time around. If you did not, then you should probably do so this time. You may find that you have empty paragraphs dedicated to a closing bold tag, or some such. For the sake of tidiness, more than practicality, you might want to fix this. I’ll assume that you did take my advice the first time round though:

  1. Press Ctrl+F (or Ctrl+H in Notepad)
  2. In the Find box, type ‘[i]’ (or whatever you used for italics in Word)
  3. In the Replace box, type ‘<i>
  4. Click Replace All
  5. Now go back to the Find box and type ‘[/i]’
  6. In the Replace box, type ‘</i>
  7. Click Replace All

Restoring Italics

Now do the same process for the underlined and bold tags. Note, though, that there’s no point in putting the title or chapter headings in bold, because we’ll be doing that another way in a minute.

  • Underline: [u] and [/u] should be <u> and </u>
  • Bold: [b] and [/b] should be <b> and </b>

FURTHER FORMATTING

These are the basic tags, and others will rarely be necessary. If you need something that I haven’t covered, refer to the list of tags that Kindle accepts (link)(but not until the end of this guide). If you do, just remember to use the closing tags too (or you could leave a comment asking me).

UPDATE: Since originally writing this, it has become clear that using pixels as a unit of size for font, indents, etc., is not the best way. Kindle users can, of course, make the font whatever size they want, so messing with it isn’t a great idea. Because it is what I have used until now, I will leave it in the below examples, but consider these two points: 1) The basic font size doesn’t need to be set (the very next bit of code I tell you to put between the style tags), and 2) Where it is important to put sizes (such as the text indents), you can use ’em’ rather than ‘px’. Em will change the size relative to what the reader has selected – so a font size of 1.5em is basically 1.5x the font size they have selected. This is handy for things like chapter headings, if you don’t use h2, h3, etc. (coming up).

Paragraph indenting is simple to set up. Go back to the top and, in between the title closing tag and the body opening tag, put in the following:

<style>
p {font-size:12pt; text-indent:20px;}
</style>

This might be too small an indent for you, but you’ll be able to preview the file later, so unless you already know what you want the indent to be, just leave it like this for now.

The problem with this is that, in fiction, the first paragraph after a break shouldn’t be indented. What we just did says that the indent should occur every time the paragraph tag is used. To get around this, you can go to the first paragraph tag after every break and change that first tag:

<p> becomes <p style="text-indent:0px;">

If, on the other hand, you don’t mind having no indent for paragraphs (perhaps your work is non-fiction), then don’t insert the style bit at the top. Instead, if you find a paragraph that needs indenting, use the above code in the paragraph tag, but put ’20px’, or however much you want it indented.

Now, let’s insert page breaks (i.e. forcing a new page, such as at the end of a chapter). You’ll presumably want these between chapters, and after your title page, copyright page, table of contents page, etc. If you’re familiar with HTML, don’t get a carried away. This simple line of code is exclusive to the Kindle, so you probably don’t know it:

<mbp:pagebreak />

That space before the forward slash is intentional, of course. Always make sure to write your bits of code exactly as written here.

Next, you’ll want some blank lines. If we hadn’t taken the file into Notepad++, it would be riddled with iterations of &nbsp;. Instead of these, we want <br />. That’s a space between the ‘r’ and the forward slash, if it isn’t clear. You may want one of these, or two. In front of my title and copyright information, I’ve used three each to push said bits of content down the page to be more centralised. This doesn’t work with the older E-Ink Kindles, but seems to with the Kindle Fire tablets and Kindle for other devices, and I think it looks better like that. It’s entirely up to you.

The <br /> tag forces a line break. The forward slash tells you that it’s one of the few that doesn’t need a closing tag.

So, for example, the top of my first chapter looks like this:

<p>ONE | QUITTING TIME</p>
<br />
<p style="text-indent:0px;">As his nose cracked under my knuckles [...]

Well, actually, it doesn’t, because I have different tags on the chapter heading, but I didn’t want you to get hung up on that before we get to it.

Speaking of which, we might as well do that next. There are different ways of doing this. The most obvious is to use the header tags. That is, <h2> through to <h6>, getting progressively smaller. The <h1> is reserved for the title, so don’t use that. I would go for <h3> personally, but you may prefer <h2>. Anything beyond 3, though, will probably be too small. Again, you’ll be previewing this later, but if it helps at all, the section headings in this guide are <h2>, while the ‘What You Will Need’ and ‘What We’ll Be Doing’, back at the start, are both <h3>. There’s more of a difference on the Kindle though.
The header tags replace the paragraph tags, so the chapter I just showed you would read:

<h3>ONE | QUITTING TIME</h3>

You’ll probably want it centred, so that changes it to:

<h3 style="text-align:center;">ONE | QUITTING TIME</h3>

NOTE: The American spelling of ‘center’ is intentional. Don’t try to change any code to British English, because HTML simply isn’t written that way and it will stop working.

The way I have actually done my chapter headings is like this:

<p style="text-align:center;"><b>ONE | QUITTING TIME</b></p>

Why I did that…I have absolutely no idea. But I’ve done that with everything I’ve published on the Kindle. I have a vague recollection of something to do with a table of contents being automatically generated based on the header tags, but I don’t think that’s a thing. I couldn’t find anything about it when I Googled it. I can’t for the life of me think why I would have done that, but never mind. If you find any issues using the header tags, you can always come back and try it this way instead.

If you have any asterisks or other kinds of symbol for breaks, you’ll probably want them centred. This is as simple as centring anything else we’ve done so far. You’ll also want a space above and below the symbols, so it will look like this:

[...] end of section.</p>
<br />
<p style="text-align:center">* * *</p>
<br />
<p>Start of next section...

I’ll say a quick bit about some other tags you might use:

  • <blockquote> could be used for a newspaper clipping, or a quote from a TV channel, or something like that. It has it’s own margins and indents, setting it apart from the normal text. You can’t use the <p> tags inside it, so use <br /> to create new lines
  • <hr /> creates horizontal line all the way across the page, as seen breaking up the sections of this guide. If my content area didn’t have a fixed width, the lines would span the entirety of your screen. It requires no closing tag
  • <strike> formats the contained text as strikethrough
  • <sub> and <sup> create subscript and superscript

THE FRONT MATTERS

Now we need to format the front matter (i.e. the title page, copyright page, etc.). As I mentioned earlier, the title should be between the <h1> tags. You’ll also want it centred.

<h1 style="text-align:center;">ACTS OF VIOLENCE</h1>

Below this will be your name, also centred:

<p class="author" style="text-align:center; text-indent:0px;"><b>ROSS HARRISON</b></p>

You may have a series title to go above your title; do this the same way we just did the author name, but remove the ‘class=”author”‘ attribute.

Next is the copyright page. This is how I have done mine:

<blockquote style="text-align:center; font-size:10pt;">Copyright © 2014 Ross Harrison
<br />
Cover by Mark Williams, copyright © 2014 Ross Harrison
<br />
The right of Ross Harrison to be identified as the author of this work has been asserted in accordance with the Copyright, Designs and Patents act 1988.
<br />
All the characters in this book are fictitious, and any resemblance to actual persons, living or dead, is purely coincidental.
<br />
All rights reserved. No part of this publication may be reproduced, stored in a retrieval system, or transmitted in any form or by any means, electronic, mechanical, photocopying, recording, or otherwise, without the prior permission of the author.</blockquote>

The <br /> tags could easily come at the end of the sentences, but I broke it up to make it clearer for this guide. I made the text a little smaller too, for aesthetics’ sake.

If you have an author’s note, or anything else, it will most likely be done just like a normal chapter, except you may want it centred. By now, you’ll be able to work out how to do that.


TABLE OF CONTENTS

We’re nearly there now. The table of contents is pretty simple. First, create a page (using <mbp:pagebreak />) and simply copy and paste in your list of chapters. You should include the title page and anything that comes after the main content. Enclose each line in <p> tags.

Next, we need to create anchors and links to those anchors. Go to your first chapter heading and change the line to the following:

<h3 style="text-align:center;"><a name="Chapter 1"></a>ONE | QUITTING TIME</h3>

What you put after ‘name’ is up to you; it could be the actual name of the chapter. This is an anchor, which we can now link to from the table of contents. Do the same for the rest of your chapter headings, title, and any other place you want the TOC to link to. In other words, put <a name="Name"></a> right before text, always inside the paragraph or header tags. Make sure not to use the same name twice.

Next, go back to the table of contents. We’ll now point each one to the right place. So, using the first chapter again, it will look like this:

<p><a href="#Chapter 1">One | Quitting Time</a></p>

The hash tag/pound sign goes in front of whatever you have named the anchor, without a space.

HTML Finished

Now save, go to where you have the file saved and double click it. If it doesn’t open in your browser, then something is probably wrong. It won’t look right in the browser, of course (not least of all because it won’t recognise the page break code), but you can test each TOC link to make sure they go to the right place.


AFTER CARE AND PREVIEWING

That should be pretty much it for the HTML side of thing. You are able to add images into the work, but that would make the guide even longer, and most people don’t have images. It also raises the delivery cost that Amazon charges. If, however, enough people are in need of help with images, I’ll add it to the guide.

Hopefully I’ve covered enough in this guide that if you need to do anything else, you can piece it together from what’s here. Otherwise, you can ask in the comments. If you require any special characters, simply copying them from Word and pasting them should do the trick; otherwise, here’s a list. Just make sure to preview to ensure it displays on the Kindle properly.

To preview your file, you can download the Kindle Previewer here. All you need to do then is click ‘Open Book’ and find your HTML file. The previewer will then convert the file into .mobi, which Kindle uses, and display it for you as it will on a Kindle. If you go to the top and click on the ‘Devices’ tab, you can switch between various kinds of Kindle to see the difference.

Kindle Previewer

Now that you have the .mobi (it will have saved in a folder in the same location as your HTML file), you can put it onto your own Kindle if you want. The save location will be slightly different depending on what device you are using, but for me, I simply plug my Kindle into the computer, open its folder, open the ‘documents’ folder, and drag the .mobi in. Then you’ll be able to open it on your Kindle for a better idea of how it will look.

Once it is published on Amazon, you’ll be able to download it for free (assuming you sign in to KDP with your main Amazon account), and know for certain that it looks how you want it to. In the very unlikely event that it doesn’t, you can easily update the file even after publication.


PUBLISHING

KDP

This part is pretty simple. Go to Kindle Direct Publishing and sign in with your Amazon account, or create one. On your Author Dashboard, click Add New Title.

The next page will ask you for the book’s details and those of the author. You will also upload the cover and HTML file here. Before you come here, you’ll need to have thought about both Kindle Select and whether or not you want DRM (Digital Rights Management) on your book. I have said a little about the former in the last part of my How to Write a Book Guide, but you’ll need to read about the latter for yourself. I always say no to it.

The second page is where you will price your book and choose your royalty rate. This is either 35% or 70%; each has minimum and maximum pricing requirements. You will also be able to enrol in Matchbook, which means if you have a print copy of your book on Amazon as well, you can give the customer a special price for the ebook if they buy the physical copy.

And…that’s it. Hopefully you found this guide helpful, and hopefully I’ve covered everything most people will need. If you have any questions, let me know in the comments.

How to Write a Book: The End

We’ve done the preparation, the writing, the editing, and you feel like you’ve reached the peak of a mountain. Now it’s time to turn around and see the next peak looming over you.

Remember, as with everything that has come in part 1 and part 2, everything I mention here needs its own in-depth research.

THE ROAD TO PUBLICATION

Publication

Perhaps you were writing only for yourself, or your friends and family, or because an alien parasite crawled into your head and made you. In these cases, you may not be interested in publication of any kind. However, even in such cases, you may still want to have a professional-looking book to give to said friends or family, or even to have sitting on your shelf where no one will ever see it but you. And the parasite.

– Which Road?

Will you be taking the traditional route to publication, via an agent and publisher, or will you be self-publishing? Again, this is an entire article’s worth of debate and discussion. Self-publication doesn’t have the same stigma as it used to and is not the easy route, or the one you only take after you’ve repeatedly failed to secure an agent and/or publisher.

Each route has it’s own pros and cons, and you should consider both properly and thoroughly. If you intend to go the traditional route, the next section is irrelevant to you.

– Ebook vs. Paperback

At this point, I’m sure you’ll have done some research…right? You’ll know the kind of prices you’re looking at for paperbacks/hardbacks and ebooks, which is more popular and from where, and which is best for first-time authors. I won’t try to steer you away from either, but I will say that whether you want a hardcopy version or not, you should do an ebook.

E-Book or Print

On the customer’s side of an ebook, they are usually cheaper, meaning people will be more likely to take the risk on an author they’ve never heard of. They are also more likely to buy it on a whim, just to have things loaded on their e-reader; fewer people do this with physical books.

On the author’s side, ebooks cost nothing but a percentage of every sale. Paperbacks cost quite a bit, depending on what source you use, and thus usually need to be sold at higher prices than paperbacks or hardbacks normally would.

Createspace and Lulu are probably the most popular destinations for those wanting physical copies of their book. On the surface, it seems free, but you’ll need to pay for a proof copy before you publish. That’s not really a big deal, although the price to you is usually the same as you would pay for an actual published book.

This leads into the main downside to services such as these. Because they charge so much for print on demand, you will have to up the sale price considerably to even make a tiny profit. I had to up the price of the paperback version of Temple of the Sixth to $14.84 (and £9.99) in order to be making $0.05 through the Expanded Distribution (i.e. channels other than Amazon and Createspace itself). Let’s be honest: that’s a little too much for a paperback.

For Shadow of the Wraith, I now use Lightning Source. They are a little different to the aforementioned places, and require a small annual fee. This fee means that the cost of actually printing a copy of the book is lowered, and I’m able to sell it for £7.99. Bearing in mind that this book is just under 130,000 words, that’s a lot more reasonable.

The percentage of sales I get from the physical versions of the books is so low as to be practically non-existent. Due to this, I made Acts of Violence ebook only. It’s a lot more popular when it comes to unknown authors.

– Cover

Despite the saying, your book will be judged by its cover. If you are taking the traditional route, this will be taken care of by other people.

If you are self-publishing, don’t make the same mistake that so many self-published authors make, and create the cover yourself. Unless you are a very talented graphic designer, the results are likely to be catastrophic. And the worst thing is, you probably won’t even realise.

I can genuinely say that I could count on one hand the number of good author-made book covers I’ve seen. You might think that the content is far more important than the cover – and it is – but if your cover looks cheap, unprofessional, and lazy, it will reflect badly on you and the book. Many, many people will not make it past the cover if this is the case.

Of course, just because someone is a professional doesn’t mean you’re guaranteed a good cover. There are professional cover designers out there, but be wary that they aren’t just people who know that a book cover needs a picture, the title, and the author’s name, and so decide that they’ll call themselves a professional. Make sure to look at their previous cover designs. I’ve seen so-called professional covers that are simply horrendous Photoshop jobs too.

Kira cover

Another thing to know is that being artistic and being able to put together a book cover are not the same thing. That said, simply finding an artist may work for you. If you do it this way, the thing to remember is the size ratio. The largest size I have my ebook covers in is 1400×1867 (pixels), and that’s for uploading to Smashwords. Your artist will almost certainly work in a large size anyway, but make sure they know that it’s for a book cover and so needs to be large (the artist made the image for Kira’s cover 2400×3200, which gives me plenty of room to work with), and that it needs to be a certain ratio. If you want, just tell them the minimum size you need (as above, with Smashwords) and ask them to work on it at double that size.

Be aware, too, that ratios will be slightly different for different places. The ratio for KDP is different to Smashwords is different to the paperback. So to be sure, try to know in advance all the sizes you’ll need and tell the artist so he/she can incorporate bleeds (i.e. they’ll make sure the image reaches the limits of the largest size, while the important parts are placed so that they won’t be cut off in the smallest).

If it’s a paperback, you’ll need a back cover and spine as well. Createspace will have a cover template that shows not only the size the image should be, but where the spine text goes, etc. Even if you’re not using Createspace, if the company you are using doesn’t have such a template (although they should), then steal it from Createspace!

Obviously, I’m biased, but I think this method of finding an artist to do the cover art has worked well for me. They create the art based on my (probably overly-) detailed descriptions, and then when they give the me the finished work, I put on the text. Again, you should have at least a basic knowledge of design before you put the text on, or you may end up ruining a perfectly good piece of artwork. I created the plaque for Kira’s cover, and put the text in as though it were engraved, but I did it too small. It looks good on the A3 poster I have on the wall behind me, but you can’t make out the title in thumbnails, and my name is too small even in larger sizes.

– Formatting

Not hugely important if it’s going to sit on your computer, or be printed out on A4 pages and stapled together, but otherwise this is vital. It’s all different depending on whether you are going for paperback (or hardback) or ebook format.

If this is for an agent or publisher, they will likely have their own requirements for formatting. Usually, it should be double-spaced and in a certain font size. Tailor it to their requirements. For self-publishing, continue reading.

Formatting

If you’re formatting for a physical copy, most of what you’ll need to do is obvious: centre the title, author name, and copyright details; set the title, author name, and chapter headings to larger font size and maybe bold; indent paragraphs (but not the first paragraph after a break); set everything to a good, readable font and size; set out paragraphs correctly (again, indented and with no spaces between them for fiction, vice versa for non-fiction); set justified alignment.

Then the printer will have their own requirements. Usually, you will be able to download a template if you really want to, otherwise you can simply set the margins, paper size, etc. to what they tell you.

Formatting for an ebook is both easier and more difficult. Easier because there’s pretty much no design decisions for you to make. More difficult because it’s a more in-depth process.

If you are self-publishing with Smashwords, you’re in luck, because I’ve already written a guide to formatting for that site. I recommend that you do use Smashwords, but I’ll say more about that later.

For Amazon, you should preferably know HTML, as you can make the ebook look exactly how you want it, and ensure there are no formatting issues or glitches (other than by human error). Otherwise, you can simply upload a Word document to the Kindle Direct Publishing platform and it will automatically convert it for you. While this method does seem to be pretty well done, I personally prefer to the peace of mind that comes with knowing I put in something that couldn’t be screwed up by an automated process.

While writing this, I have decided to write a guide to formatting via HTML for Kindle (if you want the guide, let me know in the comments so that I’ll be enthused!), but until then, just follow Amazon’s directions and then go through the converted file with a fine-tooth comb to ensure there are no issues.

EDIT: I have now written the KDP guide!

– Proofreading

Again, this is unnecessary for those travelling the traditional publication route, as the publisher will deal with this and editing.

Proofreading comes after a professional editor goes over your work and makes you cry. They are the last stop before the book goes to print, and the last hope for errors to be eradicated like the vermin they are. They are unsung heroes.

Incidentally, I’m about to start my proofreading business

Proofreading

First, know the difference between a copy-editor and a proofreader, as you don’t want to be paying for something that you’re not going to get. For example, fact-checking is not up to the proofreader. If you claim King Henry IX had six wives, then that’s your error. Granted, in such an obvious case, the proofreader may spot it, and probably won’t ignore it, but don’t expect fact-checking.

If you’re self-publishing – which you are if you’ve read this far – there’s a good chance you won’t be able to afford an editor and a proofreader. Proofreaders are, although fairly-priced, quite expensive, and editors even more so. All the more reason to learn the difference before deciding which you need.

Most self-published authors tend to go for a proofreader. This may be the price difference, or ego, or perhaps enough work is put into their own editing that a proofreader is more cost-effective. The choice is yours, as always.

One thing I will say, though: don’t go to publication without having an editing professional of some kind go through it. For an average length novel, I would say aim for £600-700 and start saving a little bit every week even before you’ve started writing. Unless you have a money tree. Or a good job.

– Finding An Agent

Harder than writing your work of art is finding an agent for it. You will, of course, need an agent who represents the genre that you’ve written in. This has varying degrees of difficulty depending on said genre. When I was looking for an agent for Shadow of the Wraith, it was quite difficult to find agents who represented sci-fi, were taking submissions, and weren’t looking only for hard sci-fi or YA sci-fi.

Don’t be afraid to query the agency if you’re unsure. They might list sci-fi but not fantasy, and while the chances are that means they don’t accept fantasy, the two are usually pushed together so it’s reasonable to ask. But don’t ask an agent who lists only children’s books if they’ll accept your anthology of erotica short stories, or one who lists only romance if they’ll accept your dark fantasy Game of Thrones killer.

Literary Agent

As usual, a good place to start is the internet. You can find lists of literary agents such as this one, which is for UK agents. There’s not a lot of point trying to get an agent who isn’t based in your country, so search for ‘literary agents [country]’.

Next, follow the submission guidelines for the agents very closely; don’t assume that simply getting in contact is sufficient, or that every agency’s policies are the same. If an agency lists on their website an agent dedicated to your genre, address your submission to that person (unless otherwise directed), using their name in the cover letter.

NOTE: Before you send anything to anyone, take a copy of your work – be it printed, on CD, or on a flash drive – and post it to yourself. Then don’t open it when it arrives. This way, you’ll be able to prove (with the sealed, dated envelope) that the work is yours, should the need ever arise. Which it probably won’t.

Generally, you will need the following:

  1. A cover/query letter – this basically states the genre, the word count, a brief outline (the blurb should suffice), and perhaps anything unique about the book. DO NOT write one cover letter and send it to every agency – address the agent by name if you know it, and if possible, make a mention of something about the agency (without being contrived) that shows you’re not just using the spray-and-pray method.
  2. The synopsis – this is a more detailed outline of the book. It is notoriously difficult to write a synopsis, but read some samples and a few guides on how to write them and it won’t be too much of a challenge. Don’t be afraid to give away plot twists in the synopsis, as much as you want to keep them close to your chest. A synopsis is usually between one and two A4 pages (the agency may specify a length).
  3. The manuscript. Not all of it, of course. Usually, they will ask for around 2-3 chapters or 30-50 pages. By this, they mean the first chapters or pages – and they usually clearly specify that too – so don’t try to pick out the best 50 pages in your book. Make sure it is in the specified format (usually Word, sometimes PDF, or simply posted).

Again, follow the individual agency’s directions closely. Don’t email the manuscript to them if they say postal submissions only, don’t Tweet them your pitch, etc. Do only what they say, or you will annoy them and make yourself seem unprofessional. Not to mention if you show that you can’t read and follow simple directions, why would they want to work with you?

It will be helpful to set up some kind of document to keep track of what agencies you have submitted to, when, who has responded, who has rejected, etc. You will probably be submitting to quite a few agencies and you don’t want to accidentally do so twice.

Rejections

You will be getting a lot of rejections, unless you’re very lucky or have insane, never-before-seen talent. Don’t forget that a lot of agents will have interns or whatever who look at the submissions before any actual agent does, and it might not even get past them. Cruel and unfair, but reality. Also, plenty of agents have to confer with their colleagues even after they decide they like a manuscript, so the final rejection may come after long deliberation. Just look for lists of how many times famous authors were rejected, and you might feel a bit better.

You’ll have come across the warnings in your RESEARCH, but make sure you don’t waste any time with an agent (or publisher) who wants you to pay them for anything. At best this will turn out to simply be vanity publishing (where your books will get printed out and then sit in a warehouse doing nothing), or at worst it will be a scam. Real agents will only ever make their money as a percentage of what you earn.

– Finding A Publisher

This will be taken care of by your agent, once you have secured one. While actually getting an agent is a very big step, getting a publisher will be equally difficult and stressful. But at least your agent will be doing the work for you.

There are some publishers – indie ones – who will accept submissions directly from authors, in the same way as an agent. One problem with these is that their funds will be limited, and you will end up doing a lot of work to market and get your book into bookshops and so on. On the other hand, authors are having to be more involved in that with bigger publishers these days anyway. And an indie publisher will have the enthusiasm to do the best they can for you; they won’t be foolish enough to be in it for the money!

The bigger downside is that this is the area where most scammers operate. They will pose as indie publishers, waiting for naïve, hopeful first-time authors to walk into their trap, thinking that they’ll cut out the middleman and keep more royalties. Again, though, if there is any mention at any time of you paying the publisher for anything, you know to walk away. Which means not signing anything until the entire process and obligations of both parties are down in writing. Make sure to read that writing very carefully, and if you don’t understand anything, get professional help to read it (asking the publisher what it means kind of defeats the point).

But genuine indie publishers do exist; I’m friends with one on Facebook.

– Where To Self-Publish

If this is the route you decide, there are multiple platforms for self-publishing. To name just a few:

Buy from Smashwords

As I mentioned, I use Lightning Source and Createspace for the paperbacks, Lulu for a hardback, and KDP and Smashwords for the ebooks. I looked into Feed-a-Read and found it to be too expensive, and the same goes for Lulu – although the special edition hardback of Shadow of the Wraith is for sale, I really only went that route for myself.

In the future, I will only use Lightning Source for paperbacks, as Createspace is expensive and has pretty poor service. If you decide to publish in paperback, do plenty of research into who does what. You’ll want to know where they distribute to, and if it costs extra to distribute beyond their own marketplace (Createspace only recently made it free to distribute to outlets beyond it’s parent, Amazon, even though in reality this means simply listing the book title with those outlets, not shipping physical books to them).

When it comes to ebooks, I don’t think there’s any need to look beyond Amazon KDP (Kindle Direct Publishing) and Smashwords. Obviously you’ll want your book available on Amazon, for Kindle. The way to go about this is directly publishing with them. As I mentioned, I will at some point write a guide to properly formatting your book for KDP with HTML, but until then, just follow their directions.

You will be hassled at first about enrolling the book into KDP Select. This requires you to give Amazon exclusivity for 90 days, meaning you can’t publish the ebook anywhere else. Again, research it. I enrolled Shadow of the Wraith into Select, and got a lot out of it. I was able to set the book to free for up to five days within those three months, and a lot of real sales came out of that. However, when I did the same with Acts of Violence, I think something had changed. The free days yielded no real sales at all. I can’t be sure, but I think when I first did it, the book’s rank remained high for a while after it was free, allowing it to be seen more. But the second time round, the rank disappeared the moment it went back to normal price, meaning it didn’t have any extra exposure. I won’t bother with it again. It’s only 90 days, though, so perhaps you’ll decide it’s worth a try.

After KDP, really the only other place you need to go is Smashwords. There are others, but Smashwords pretty much covers everywhere you’ll want your book to be sold, including Apple iTunes/iBookstore, Barnes & Noble, and Kobo. It will also be distributed to three companies that sell to libraries, a handful of places you’ve probably never heard of, and will be sold on Smashwords itself. It will also turn up in places you don’t expect, like Waterstones and so on.

So, in short, publish with KDP and Smashwords.

– Advertise

Don’t sit back and expect the book to start selling by itself. Inform those writing groups and whatnot that you’ve been in contact with, use Facebook and Twitter (learn to use hash tags properly), find other websites to join and utilise, such as creating an author profile on Goodreads.

Advertise

Forums are good places to go, if you are going to participate in conversations, and not use them solely for advertising. There are two Kindle-specific forums that I use occasionally: Kindle Users Forum (UK) and KBoards (US). Each have some small downsides, such as restriction of threads and posts about your own work, but if you use them right, you’ll see a spike in sales.

As with everything else, research. The advertising part is a process almost as in-depth as the rest, and there is no sure-fire way to success. There are places to get free press releases, review bloggers to get you well-written reviews, and plenty of other things you won’t think of if you haven’t researched.

PROFIT!

Profit

Or more likely, don’t. Receive a trickle of money, if you’re lucky. Either way, keep advertising and keep writing.

THE END

How to Write a Book: The Middle

So, we’ve covered the preparation stages in part 1, now it’s on to the main event:

NOW, WRITE!

Finally, we’re ready to start the fun part. It only took us 3,000 words to get here. All of that preparation might have been a pain, but there are two bits of good news. First, if you made it through the pain, there’s a good chance you’re definitely writer. Second, you’ll be glad of all the planning and research while you happily write away, fully aware of who your characters are, and their motivations and whatnot.

Fountain Pen

While fun, this part is also tricky, because it’s where people are unsure if they are ‘doing it right’. It’s extremely hard, if not impossible, to tell someone how to write something good. It either happens or it doesn’t. That said, don’t expect to have something publishable come out of your first attempt. Some authors have numerous fully completed manuscripts lying in drawers that will never see the light of day, because they’re not good enough.

The best advice I have heard or can give is to simply write for yourself. Write something that you would want to read. Try never to think ‘ah, that’ll do’. Enjoy the process and the work itself. As for knowing when it’s properly finished, or if it’s publishable, that’s pretty much up to you to decide for yourself – but don’t forget you have friends and family!

– Just Write

This part of the process is all about getting everything out of your head. Don’t edit what you’re writing. Don’t worry too much about your sentence structure, how many adjectives you’re using, and how many iterations of ‘was’ and ‘that’ you’re using. Hopefully, you should be writing fairly well by default, but all this will come in the rewriting and editing stages.

Characters come alive

By Jodi Harvey-Brown

If you’re not sure where to start even after planning, just start with anything you’re sure of: maybe a scene you have in your head, or have the protagonist do something normal and everyday, like going to the corner shop, so we’re introduced and you get into the flow of writing. You’re not chiselling into the side of a mountain, so you can afford to do things out of order and write stuff that will never make it near the finished work.

Your characters will take you in directions you didn’t expect, and reveal things about themselves that you may not have known without a thorough background check. This is part of the fun, and you will do more harm than good if you scold them and force them back onto the path you’ve set out for them.

– Backup

Remember what I said in part 1 about my computer deleting all of the work I’d done? Save to multiple computers, flash drives, external hard drives, Dropbox, even send your work to yourself in an email attachment. And backup very regularly.

– Chapters

You don’t have to decide how you want to do your chapters at this stage. You may find your scenes splitting themselves up into natural chapters as you go, or you may have to go back through later to insert them. You may decide that you don’t want to use traditional chapters. In my NEXUS series, I haven’t so far used chapters in the normal way, with numbers and/or names. I don’t think I’ve ever read a Terry Pratchett book in which he uses any kind of chapters.

It’s up to you and what you think suits your particular book. There isn’t really a right or wrong here. Choosing where to insert your chapters can be surprisingly tricky, and you may find yourself doubting your choices. Equally, not using chapters may have its own issues.

– Take A Break

Take a Break

– ‘Full Cup, Thirsty Spirit’

Know when to stop writing for the night, or for the morning, or whatever it happens to be. A good piece of advice for finishing is to never write until you’re empty. When you are in the mood to write, and it’s all flowing out of you, it’s tempting to just write and write and write, but if you finish while you still have ideas, it will be much easier to pick it up again when you return. But don’t stop after an epiphany, obviously, as you don’t want to come back the next morning and realise that you’ve forgotten where you were taking things!

Now might also be a good time to revisit your notes and plans. Perhaps not to edit them, but to add to them. I prefer to update my notes with new information and ideas, rather than ‘correct’ the old notes. Apart from anything, the planning and note taking – and especially the editing – is a different kind of writing to what you’ve just been doing, and you don’t want it to break your creative flow. So perhaps just jot down important revelations and the like, and then go to bed. Or work. Don’t forget to go to work.

– Don’t Fear The Internet

This could have easily gone in the research section, but it’s as relevant here. The internet isn’t just for Googling your name to see if you’re a famous author yet (hint: you aren’t; you haven’t finished the book). There are a lot of people on the internet: some most are a******s, but plenty will be a lot like you. Websites like Authonomy are good places for writers to learn, meet other writers, and even ask for help.

If you are active in a website such as Authonomy, you can learn a lot about writing, as well as receiving (hopefully constructive) criticism of your own work. Not only does the latter help you improve said work, but it will help thicken your skin for the inevitable bad reviews and so on later. You can also make a lot of good connections.

FINISHED!

Hooray, you’ve written a book! Calm down. At this point, I usually go straight back to the beginning and start going over it again. The better plan would be to take a longer break of anywhere between a week and a few months, then come back to it with fresh eyes.

– Rewrite

How you go about this is up to you, but I’m going to dictate anyway. Rewriting and editing are fairly in-depth topics in their own right so, as with everything else here, you should probably read (or have read) a book or article specially written for the subject. That said…

Rewrite

Don’t start with edits. I didn’t say ‘rewrite/edit’, I just said ‘rewrite’. You could say they are practically synonymous, but here that means that you should start with structural changes, not line edits. Line edits being rearranging sentences and the words within. Structural changes are drastic things that may change even the basics we planned out: genre, setting, narrator, etc.

You might, as many of us do, find that your opening just doesn’t work. Perhaps you have a prologue, the information in which would be better scattered throughout the first few chapters. Information dumps are bad!

Perhaps a character turns out to be quite boring and unnecessary, and should be deleted. Or perhaps the book is missing a vital character that you need to insert.

You might start by reading over your book with a notebook beside you. Skim over it, ignoring the wording for the moment, and just concentrate on the bigger picture. Anything that strikes you as out of place, unrealistic, overflowing with information, or anything that trips you up or catches your eye, write it down to come back to it once you’ve finished your read. Apart from anything, skimming through like this is more likely to help you catch plot holes or scenes that are too slow or too fast, etc., than a normal read, or while editing.

Some people go for a more literal rewrite at this stage, and will write the book again from scratch. Presumably, you would write an outline of each chapter and work off that, but I don’t think that method would work for me. The closest I’ve got to that is with the novel I’m currently working on. I have already written a fair amount of it, and now that I’ve finally gone back to it, I have it open on one screen while I write it again on the other. This means that some lines are identical between the two, while others are added to, or taken away; in other parts, entire chapters are added. But, again, I don’t think this benefits me any more than simply rewriting in the same document.

– Edit

Now it’s time for the line edits. Would this sentence work better if it came after that one? Would they both work better if they were merged into one? Should that whole paragraph be condensed into one sentence, or deleted completely?

Line Edit

You will almost certainly find yourself rewording individual sentences at this point. If you can avoid doing so until you make a dedicated edit run for that, it may be for the best, but it may also be unavoidable.

Just as when you finished your first draft, it is a good idea to leave the book to rest a while between edits. Fresh eyes will see new issues every time.

The final step of an edit – for me at least – is to look at the individual words. You will probably have reworded many of your sentences by now. But even when looking at the big picture, it is hard to see when you’ve overdone things. Using a character’s name too many times in quick succession, too many iterations of certain words, etc. I have a list of words I do a quick search for, to begin with. I have a tendency to use the word ‘suddenly’ a little too often. While I have slowly weaned myself off this habit, I still search for iterations of it. It’s one of those words that is rarely necessary. If I have more than, say, three iterations of it in the entire book, then it’s overused. I try to aim for only one or two but, again, only if it reads well.

Other things to look out for are unnecessary/superfluous words (usually adjectives or adverbs), correcting misused or mistyped words (it’s/its, their/there/they’re, your/you’re, learnt/learned, though/through/thought, quite/quiet, etc.), common mistakes that have become ingrained in most people’s minds (percent vs. per cent, alright vs. all right, damnit vs. dammit/damn it, affect vs. effect, etc.). I’d like to give a special mention, American readers, to ‘I could care less’. This is NOT the phrase. It’s ‘I could NOT care less’.

Some words that are commonly used unnecessarily are ‘that’, ‘very’, ‘suddenly’, ‘just’, ‘then’. The list goes on, and it’s not difficult to find whole articles (and probably books) written on the subject of such words. Don’t say ‘ran very fast’, say ‘sprinted’. Don’t say ‘very angry’, say ‘furious’.

Dialogue Tags

But don’t go through your work changing words for no reason. Don’t go through and think ‘Uh oh, I saw that on a list somewhere; I’d better change it’. For example, some people say that the word ‘said’ is overused. Well, I’d like to see a writer not use ‘said’ as a dialogue tag without crossing into highly irritating, contrived territory. Other sources will say that ‘said’ is by far the best dialogue tag, because it becomes all but invisible to the reader, allowing them to be aware of who is talking without having to focus on contrived tags.

It can be difficult not to fall into the trap of changing words simply because they’re listed as overused or unnecessary or whatever. If you do start changing words for no real reason then at best it will come across as contrived or pompous, or at worst…remember the episode of Friends when Joey used a thesaurus to make his letter ‘better’?

In other words, use your own common sense and stick to your own style. Sometimes an overused or cliché word simply works. Again, people complain about J.K. Rowling’s overuse of adjectives and adverbs, but has that damaged her writing and career? If it works, it works. Just make sure if you break ‘rules’, and leave things in that might be topics of complaint, that it’s for the right reason (i.e. it reads well).

Consistency may need its own pass. Do you have something capitalised sometimes and not others? Is your character wearing a jacket in one scene and in the very next, he’s scratching his bare arm? Consistency in the writing itself and in the content is, obviously, very important.

There are some automated writing services online that may be of use, especially when you’re just starting out. I can’t for the life of me remember the one I used for Shadow of the Wraith, but it looked for a lot of stuff, from spelling and grammar errors to word usage and those overused words I mentioned earlier.

Whether or not you use such a thing as a basic part of your editing stage is up to you, but I would suggest you’re careful not to rely on it any more than you do on Word’s spellchecker. DO NOT RELY ON WORD’S SPELLCHECKER!

If you make it all the way through this guide and don’t notice any errors or inconsistencies, you might need to give your own work some extra goings over. For example, I’ve capitalised some words for emphasis, while italicising others. If you pick up on stuff like that, it’s a good sign.

I mention it in part 3, but it’s worth noting here too that it’s notoriously difficult to proofread your own work. You will end up reading what you know is meant to be there rather than what is there.

– Beta

The next stage for a lot of writers is to send the book off to beta readers. This basically means you give the book to family and friends, perhaps writers’ groups or websites, for feedback.

Beta Reader

While this is a good idea, it can be quite disheartening. While professional or pseudo-professional writers will likely be pretty harsh, you might find friends and family will let you down completely. I sent Acts of Violence to a handful of friends, and not one of them read it. So don’t rely too much on beta readers, as there are a few too many people out there who don’t know how to say ‘no’, and it ends up screwing things up for you a lot more than that ‘no’ would. Plus, it’s difficult to be totally honest about the negatives to a friend or relative.

So places such as Authonomy are probably your best bet, but there are downsides here, too. You can’t just upload your work and expect people to flock to it; you have to put work in. You will end up reading and commenting/critiquing more than you receive comments/critiques, but even that will help you. Even while you are identifying problems in other people’s work, you may realise that you’re making the same mistakes, for example.

In this stage, you have to be ready to take (constructive) criticism. Even pretentious writers who consider themselves wordsmiths of the highest order, yet can’t get an agent any more than anyone else, may have valid points. The main thing to remember is that, much of the time, it’s just one person’s opinion on how writing should be done. It may or may not be relevant to you, your writing, and your style.

In short, read/listen to and take in everything, but don’t make these assumptions: A) That these opinions and views all need to be implemented into your writing; B) That none of these people understand you/your writing, and they should be ignored.

Finished Book

If you have no desire to take things any further and get published, or just print out a nice paperback copy of the book for yourself, then read no more! Otherwise, part 3 will cover what you need to know next…